

French macarons have been a long-time favorite dessert of mine. I love the colors, flavors, and that slightly chewy, tender cookie with a fragile crust. I heard they could be fussy, so I never tried to make them. Instead, I left them to the French pastry experts.
That is, until I caught a video on making macarons. It looked so easy! What could go wrong?
Well, as it turns out, a lot of things.
Let’s start with this: If you read my blog or know me in person, you know I am very bad at sticking to the recipe. I enjoy “cooking with love.” In other words, I like throwing things together and making something yummy.
The first time I made macarons, I followed the directions of the video I had watched. These were very tasty, but the video left out a very important step:
Sift, sift, sift. Then sift again. If in doubt, sift.
 As I said, the first macarons I created were delicious. However, they were grainy. They were completely the wrong texture. They were not smooth. They were not shiny. They didn’t have that beautiful, easily fractured crust. Nor did they finish with a slight, chewy bite that dissolves beautifully on the tongue. These were dense, with a typical cookie texture. I was disappointed.
I tried the recipe again, this time sifting through once. They had a better texture the second time, but still lacked the true qualities of that delicate macaron.
I decided to give up.
However, just as I made this decision, my friend Jenn asked if she could pay me to make macarons for a bridal shower she was hosting. I was so flattered, I accepted.
Then I panicked.
Then I became obsessed.
I had to up my game!
My husband gifted me a book on macarons. I “poured” over the pages and familiarized myself with the different techniques. Apparently, I had used the Swiss technique before – the simplest one. After talking with Jenn about what she wanted and consulting the book, I decided to try out the Italian method, where the sugar is cooked before pouring it into the meringue.
If you don’t know what I’m talking about, I am about to enlighten you.
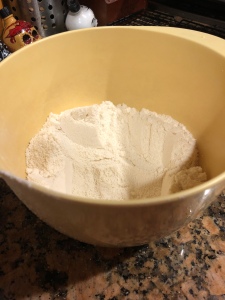
In my research I came to understand that the shell of a macaron (the cookie part) is essentially a meringue, with almond flour (or any nut based flour) added to it. This explains why the shell is so light and fragile. This is also why it is absolutely essential to sift that flour and powdered sugar before adding it to the meringue. Any clump, any larger grain, even any slightly unclean bowl, can change the texture of the shell and ruin that shiny, smooth finish.
Seriously.
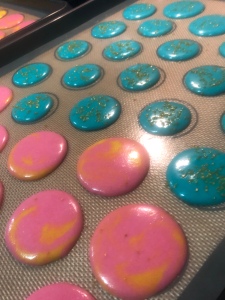
As if that isn’t bad enough, I also discovered through trial and error that even something as simple as ridges on a baking sheet can change, not only the appearance of the macaron, but also the rise of it. It can flatten out.
Exhausted yet? Well, wait for this…
Then, even if you have sifted five times, cooked your sugar, made sure every bowl was pristine, AND used flat baking sheets, the temperature of the kitchen can botch a batch!
Seriously.
I made the mistake of having dinner prepping in the slow cooker one time. The whole batch was ruined. Well, not ruined. Strangely enough, the macarons were the perfect texture three days later. However, they were initially hard and many were cracked.
Finally, I have a few more tips and tricks:
- Buy a food scale. You need to weigh all of your ingredients for macaron shells to come out right (don’t worry about the filling – that is much less of a science and more of an art),
- Make sure you have older eggs, preferably bought the week before you’re going to make the macarons, and have them at room temperature before making the meringue,
- If you can, use a silicone baking sheet with circles to guide you. That way each shell should be close in size,
- Once the shells are piped, slam them hard on the kitchen counter about 10-20 times to get rid of any air bubbles,
- Give yourself time! Make the macarons about 2-3 days ahead of when you want them to be consumed.
In the end, the macarons for the bridal shower both looked and tasted great. Some were not as perfect as I would have liked, but they were close enough. Jenn loved them, and asked me to make them again for a Holiday Open House she was hosting for her jewelry business, Bella Sparkle.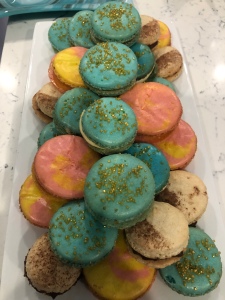
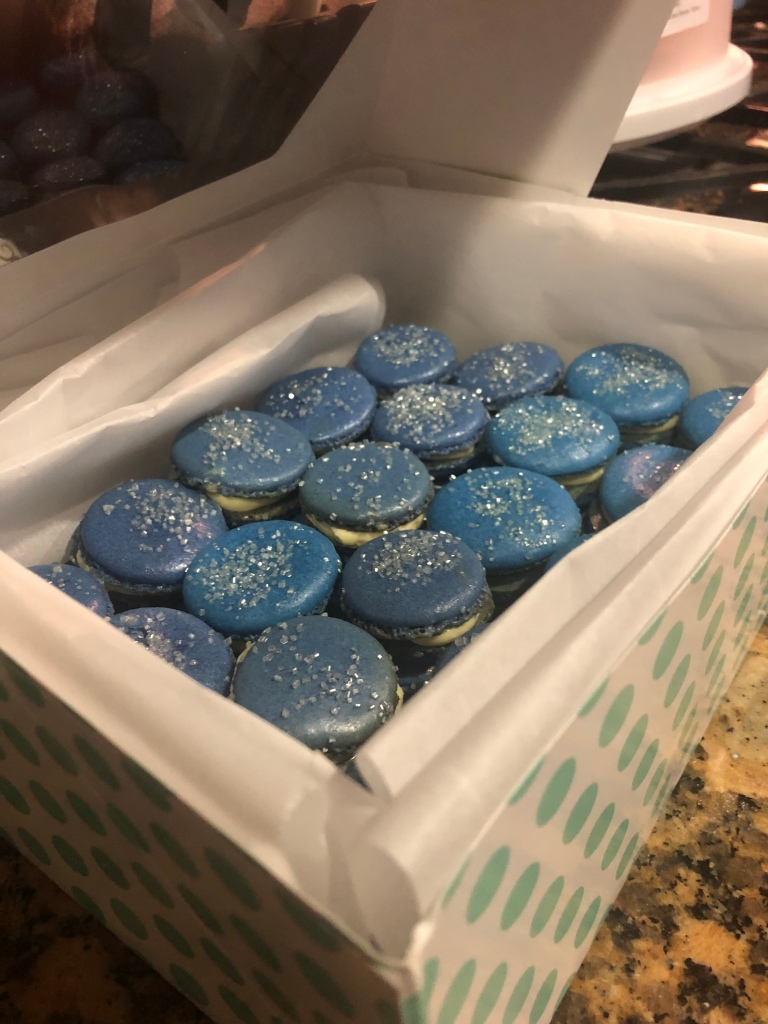
Since my first time, I have experimented with a variety of flavors, including key lime pie, raspberry/lemon, and s’mores. Once I got past the unpredictable and moody nature of macarons, I’ve had a great time coming up with different flavors and designs. I even created a macaron for Jenn’s party with her favorite flavors (crème brulee) and color (turquoise). I still think the shells are temperamental little b!+(#es, but I also think they’re fun.
BASIC MACARON SHELL – Italian Method
Ingredients:
- 165 grams of almond flour (about 1 ½ cups)
- 165 grams of confectioners (powdered) sugar (about 1 cup)
- 115 grams egg whites (about 4 large eggs)
- ½ teaspoon cream of tartar
- 150 grams of granulated sugar (about ¾ cup)
- 1/4 cup water
- Food coloring (optional)
Directions:
- Sift the almond flour 2 times.
- Sift the powdered sugar into the almond flour, then combine thoroughly.
- Sift the almond flour/powdered sugar 2-3 more times, put aside.
- In a stand mixer, whip the egg whites at medium speed with the cream of tartar until soft peaks form.
- While the egg whites are whipping, cook the sugar with the water in a small pot until it reaches 235 degrees, whisking while it cooks (you do not want this to burn). If you do not have a thermometer, you will know the sugar is ready when it is boiling rapidly for about 5 minutes. Note: This process will take much longer than you think it will!
- When the sugar reaches 235 degrees, quickly pour it down the side of the bowl with the egg whites while still whipping (the heat of the sugar can cook the eggs if you don’t keep them moving).
- Increase the speed of the mixer and whip the egg whites until stiff peaks form. This will take about 8-10 minutes. You want to be able to turn the bowl over and not have the meringue move.

- Create a well (or a hole) in the middle of the almond flour/sugar. Pour the meringue in the center.
- Mix the ingredients together with a rubber spatula. Be sure to completely blend the meringue and almond flour and sugar so it’s flowing, but don’t over mix (those shells will crack!).

- Add a couple of drops of food coloring and blend through.
- Spoon the batter into a piping bag with a round tip. (Tip: Put the piping bag in a drinking glass – it will be much easier to fill).
- Pipe the meringue onto the silicone mat or baking sheet, making small, circles, about 1 inch wide (try to make them uniform – a guided mat or the squares on parchment paper should help you). Cover any extra batter with plastic until you are ready to pipe it.

- Firmly tap the baking sheet about 10-20 times to release any air in the batter.
- Let the shells sit for 30-60 minutes, until you can lightly touch them without denting the outside.
- Heat the oven to 300 degrees, then bake one sheet at a time, for 9 – 12 minutes, depending upon how hot your oven gets. Vent the oven once or twice throughout the baking process. You want the air to get in there.
- Remove the shells and move the silicone mat to a cooling rack. After a few minutes, gently remove the shells from the mat.
For the filling, your imagination is your limit! Just think: lemon curd, lime curd, caramel, marshmallow, Nutella, chocolate ganache, guava, or even combinations of flavors! Just enjoy and delight your senses! Below is a very easy raspberry buttercream recipe.
EASY RASPBERRY BUTTERCREAM
Ingredients:
- 1 cup butter, softened (2 sticks)
- 1 cup confectioner’s (powdered) sugar
- ½ cup raspberry jam with seeds
Directions:
- Blend together the butter, sugar and raspberry jam until completely combined.
- If you would like it to be thicker, add more sugar.
- If you would like it to be thinner, add some milk.
- Spoon the buttercream into a piping bag.
- Pair the macaron shells, matching them by closest size and shape.
- Pipe the buttercream onto one of the shells, leaving some space on the edges for it to spread.

- Top it with the matched shell and move on to the next one.
- Refrigerate macarons to keep fresh.
- Take a deep breath… YOU ARE DONE! Pour yourself a glass of wine and put your feet up. Cheers!

You are inspiring me!!
Xo Quincy
LikeLiked by 1 person
In a word – yum! You’re inspiring me to attempt something a bit more inspired than chocolate chip cookies.
LikeLiked by 1 person
Pingback: My Little Valentine | The Wine Muse